The computer vision and image processing fields are ever-evolving, requiring more precise and streamlined image labeling techniques to ensure accurate and efficient results.
Frankly, having the data ready for your AI model to process segmentation tasks has never been simple. No matter how many samples you have, labeling them proves to be a tedious yet crucial task. You need to spend hours labeling all of them.
That’s where the Segment Anything Model (SAM), a new AI model initially developed by Meta, AI comes in handy. It stands out as a revolutionary approach that transforms diverse domains, from autonomous vehicles to medical imaging and beyond. This innovative computer vision technique transcends traditional labeling’s limitations, allowing you to accelerate your labeling process without coding.
But what is Segment Anything? How does it really help? And how can we run a Segment Anything model?
Today’s article will answer these questions to help you utilize Mobile Segment Anything’s power. We’ll also uncover the intricacies of this groundbreaking technology and its potential to reshape the way we perceive and interact with images.
Now, sit back, relax, and enjoy the comprehensive guide to image segmentation.
What Is Segment Anything Model?
Segment Anything Model (SAM) is an innovative method for creating a promptable image segmentation model that is fully autonomous and requires minimal human input. Unlike previous deep learning methods which relied on the laborious process of collecting specialized training data, manual data annotation, and extensive training hours, SAM streamlines the segmentation process.
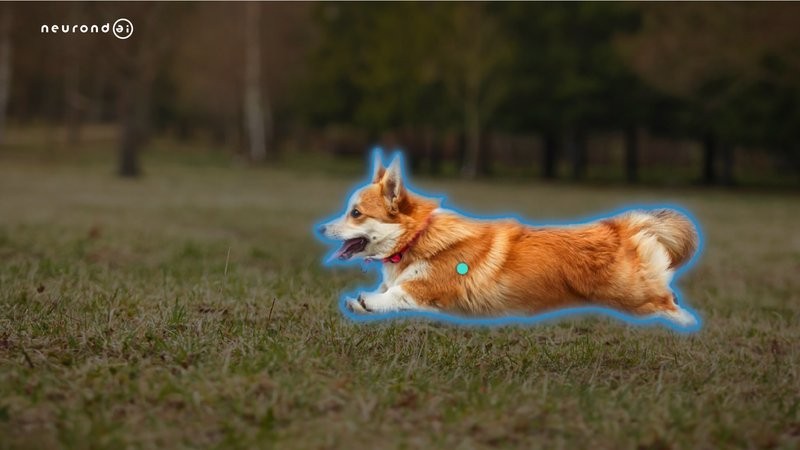
According to Meta, the Segment Anything Model (SAM) can ‘cut out’ any object in an entire image with a single click.
It produces high-quality objects from input prompts such as points or boxes. You no longer have to spend hours clicking point by point, drawing a lot of boxes with your hand. SAM allows you to quickly select any object by clicking on it or specifying the area you want to segment objects from.
This could benefit a lot of computer vision tasks, such as Object Detection, Semantic Segmentation, and Instance Segmentation.
Many companies like RoboFlow have integrated the SAM into their labeling and training services.
The question now is how to run an image segmentation model if you don’t want to expose your data to the internet.
How to Run the Segment Anything Model (SAM)
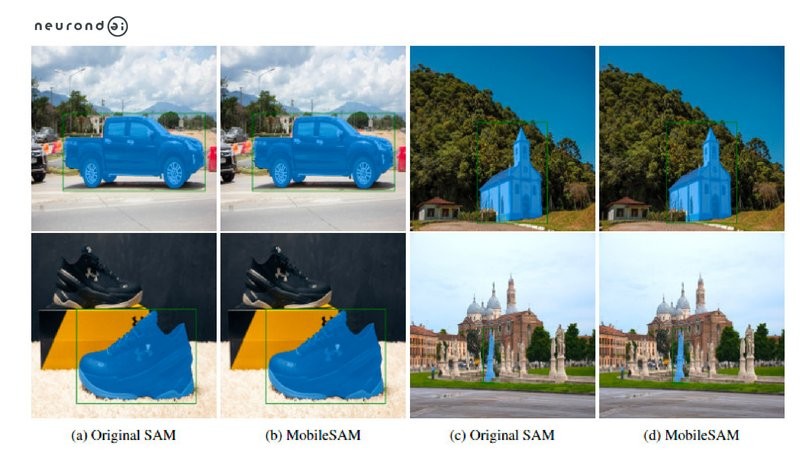
As a matter of fact, not all individuals possess high-performance computers equipped with ample GPU resources to utilize the original SAM model effectively. This is where MobileSAM proves to be indispensable, providing a robust solution.
Mobile Segment Anything Model makes SAM much lighter for mobile applications. So you can use it on your regular CPU, basic computers (or your laptop). MobileSAM’s size is only 10% of the original SAM, but it performs impressively.
Refer to the GitHub repository – ChaoningZhang/MobileSAM with the official code for the MobileSAM project that makes SAM lightweight for mobile applications and beyond!
MobileSAM is simply a segmentation model on its own, and our aim is to avoid coding. That’s why we require an application that enables us to load and apply the model to our images.
AnyLabeling is an intuitive data labeling tool with AI support from YOLO and the ability to segment anything. Follow the 5-step guide below to get started with this tool.
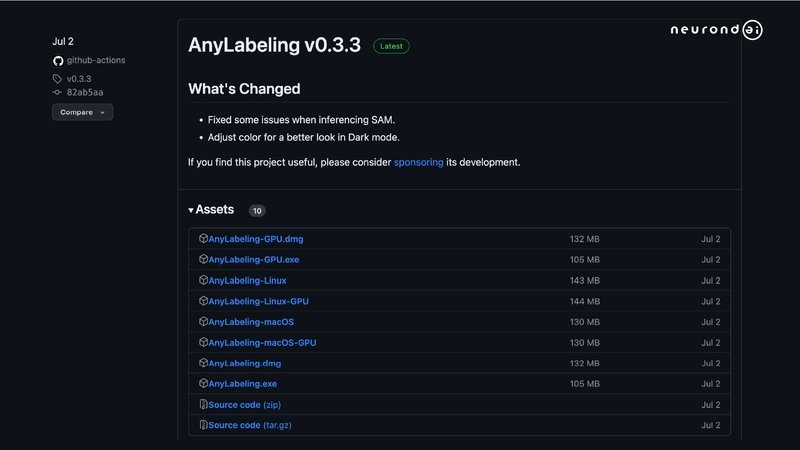
1. Download AnyLabeling
Here, you can select the version that suits your operating system: Windows, Mac, or Linux, along with CPU or GPU.
Take the CPU as an example. Now, we will choose to run AnyLabeling (without the GPU on the name).
2. Open the application from your machine, and you will be presented with the working screen.
If you’re using Mac OS, make sure to allow the app to be opened in your system settings.
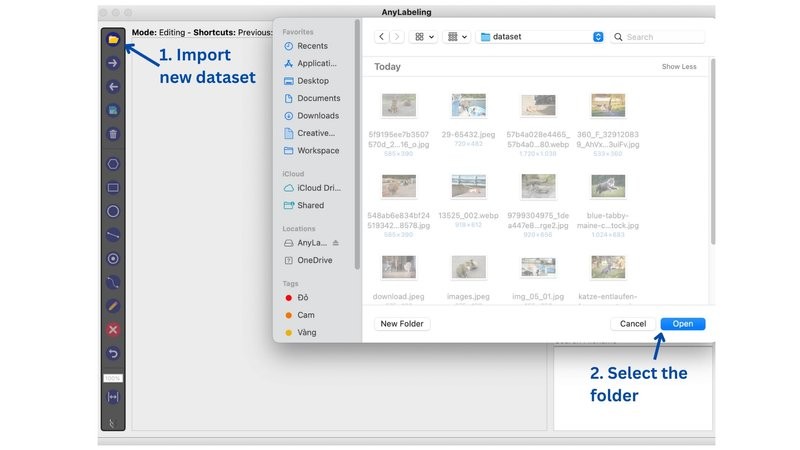
3. Click the Folder icon at the top-left corner to import our images.
4. Select your desired files and hit Open to input images.
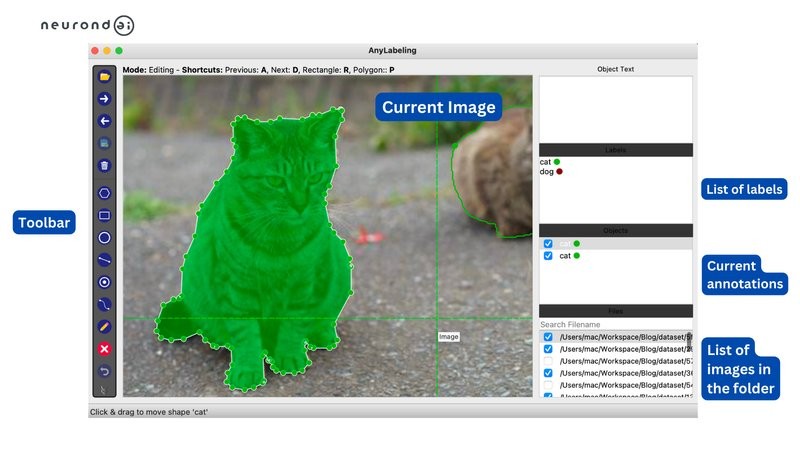
There are multiple components in the working window to notice:
Toolbar: Find almost all the helpful tools, such as Draw Rectangle, Edit Annotation, etc.
Current Image: Display your working image, allowing you to view your progress and annotations.
List of Labels: Contain all label types you specified during the labeling process.
Current Annotations: Show all the annotations on the current working image.
List of Images in the Folder: Provide a list of images within the folder.
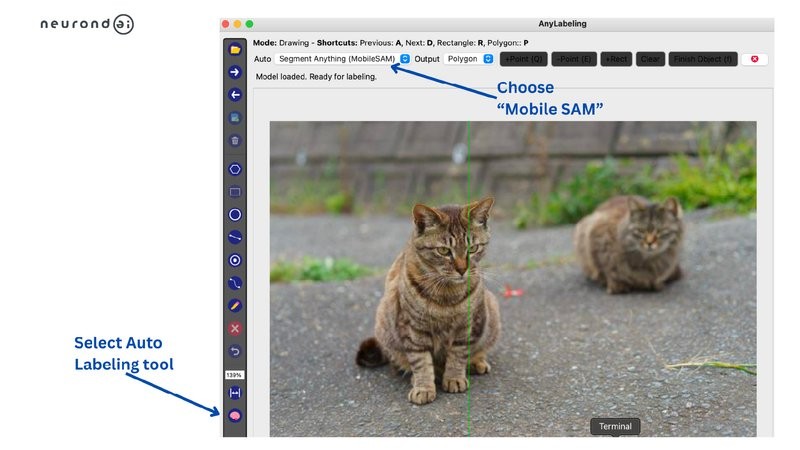
5. Select the “Auto Labeling” tool in the toolbar and choose “MobileSAM“.
You can pick another model if your computer supports enough hardware power.
AnyLableing Options
Here, you have several options:
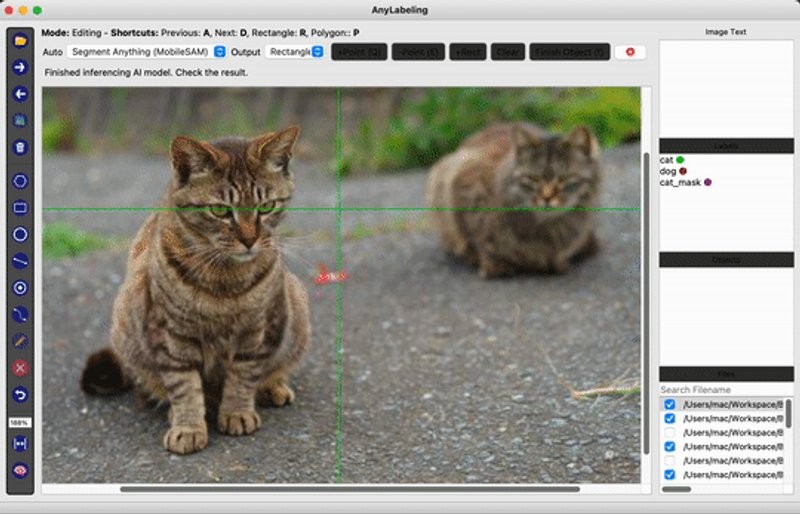
Output: Choose whether you want the result polygons (for multiple valid masks and segmentation masks) or bounding box coordinates (for object detection).
+Point: Click on a specific area and the model will create annotations. The more points you place on the object, the more accurate the annotations will be. However, the optimal number is 2-3 points. (Shortcut: Q)
-Point: Press on the area where the model should not create annotations. (Shortcut: E).
Rect: Instead of clicking, you can draw a rectangle around the object, and the model will generate the detection or segmentation masks.
Clear: Remove all the current points.
Finish Object: Complete the labeling for the object. (Shortcut: F)
Here, we will use the +Point tool to generate masks or bounding boxes for the cats in the image. You only need to click on them, and the model will generate the corresponding annotation.
Once done, click ‘Finish Object‘ or press the ‘F‘ key to select the label for the object you are annotating. You can choose an existing label or create a new one.
Generate mask for cat object.Generate bounding boxes for the cat.
Tips for Better Image Segmentation Results
However, we don’t consistently achieve satisfactory results, especially when there are many objects in the images. One way to improve it is to provide more points on the object for the model to generate better segmentation masks or bounding boxes.
Bear in mind to stay cautious because using too many points can confuse the model and lead to even worse results.
To create a complete and valid segmentation mask for the cat in this image, we need to click on its head, leg, paw, and nose.
One way to generate the mask is by using the Rectangle tool on the Auto Labeling bar. This helps us achieve better results in image segmentation when the model knows the object’s boundaries we want to label.
If you become familiar with the tool, it only takes under 5 seconds to label an object in the image. Additionally, there are more tools and shortcuts to assist you during the labeling process:
Ctrl + J (or Command + J): Edit or delete annotations on the image.
A + D: move to the previous or next image.
Ctrl + Y (or Command + Y): Reuse the previous label. This is especially useful if you’re labeling the same type of object in every image, as it allows you to skip the label selection step.
Ctrl + Z (or Command + Z): Undo the last action.
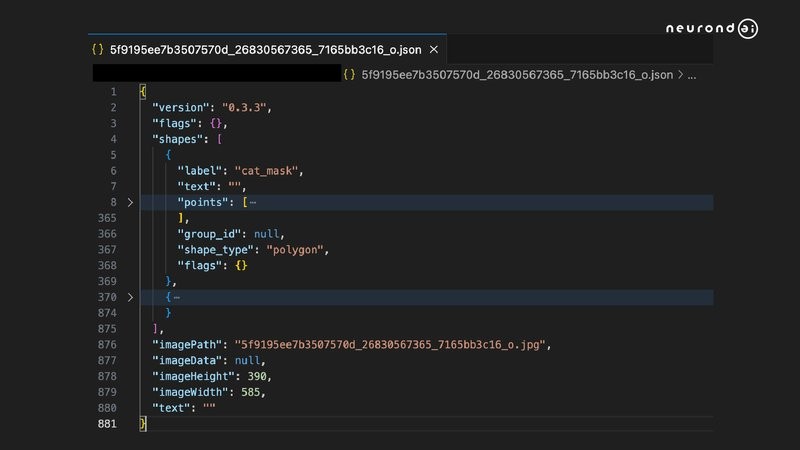
When labeling, the label files will be generated in the same folder of the images as JSON files.
The key information includes:
“label”: The label or class name for the object, which is “cat_mask” in this case.
“points”: An array of (x, y) coordinate pairs representing the vertices of the polygon or bounding boxes that outline the object.
“shape_type”: Specifies the type of shape used for the annotation, which is “polygon” here.
“imagePath”, “imageHeight”, and “imageWidth”: Information about the image to which these annotations belong.
With these label files, you can convert them to other formats, such as COCO, Pascal VOC, or YOLO for any computer vision tasks.
Get Ready for Model Segment Anything Model?
Within computer vision, the Mobile Segment Anything Model offers an on-the-go solution for image labeling tasks, reducing human involvement. With its superior accuracy and speed, the Mobile Segment Anything Model is poised to significantly enhance the image labeling process and revolutionize various industries that rely on annotated data engine.
We’ve gone through a brief overview of the AnyLabeling tool and Segment Anything. However, there’s more to discover, such as importing your previous annotations, automatically generating mask segmentation with Segment Anything, and training an object detection model.
With the continuous advancements in machine learning and mobile technology, the Mobile Segment Anything Model for image segmentation represents a significant step forward in image labeling, opening new possibilities for various applications and paving the way for future advancements.
Stay curious about image segmentation/information extraction and how we apply the technology to business cases? Check out our recent post about Information Extraction Tactics.
Trinh Nguyen
I'm Trinh Nguyen, a passionate content writer at Neurond, a leading AI company in Vietnam. Fueled by a love of storytelling and technology, I craft engaging articles that demystify the world of AI and Data. With a keen eye for detail and a knack for SEO, I ensure my content is both informative and discoverable. When I'm not immersed in the latest AI trends, you can find me exploring new hobbies or binge-watching sci-fi
As a matter of fact, financial firms are under increasing pressure to do more with less. They demand faster closes, more accurate reporting, and deeper insights without proportional increases in budget or headcount. This growing gap between expectations and resources is forcing finance leaders to carefully consider how time and effort are really being spent. […]